HEADER - Web

Home About Me Tutorials Recipes Grab a Button Contact Shop Image Map

Thursday, January 30, 2014

DIY Dog Training Bell

Tifa is now almost 9 months old.. So crazy to think about. These past few months she has been challenging to say the least. Within the first month of us being in our new apartment she had chewed a hole in our carpet, the molding around the bathroom door, countless socks from our laundry basket, and a whole roll of toilet paper. We also discovered she can jump over baby gates! :/ Boo.  

I think it is safe to say she is finally coming out of this rebellion stage (knock on wood). She is turning out to be a great dog though. One thing I absolutely love about her is her willingness to learn new tricks. She is hands down the smartest dog I have ever met! In about 10 minutes Tom taught her how to roll over. Pretty awesome if your ask me, but then again I am a little biased. 

I have always wanted a dog who told me when they needed to "go outside". So after doing some initial research, I decided it was time to make her a bell and get started! If you want to learn how to train your dog to use a bell, {this} was my favorite article I found! 


And now without further interruption, here is how you can make your own dog training bell! 

Supplies:

- Bell 
- Wire Edged Ribbon 
- Scissors
- Hot Glue Gun and Glue Sticks

Directions:

1. First things first, you want to make sure your pooch can reach the bell so she can tell you she has to go outside! Once you have your dog handy, measure the length of ribbon you will need and then cut. 

2. If your ribbon is too wide to fit around the door handle like mine, fold the middle of your ribbon in half "hot dog style". Then take your hot glue gun and glue the halves together so they stay folded and will fit nicely over your handle.


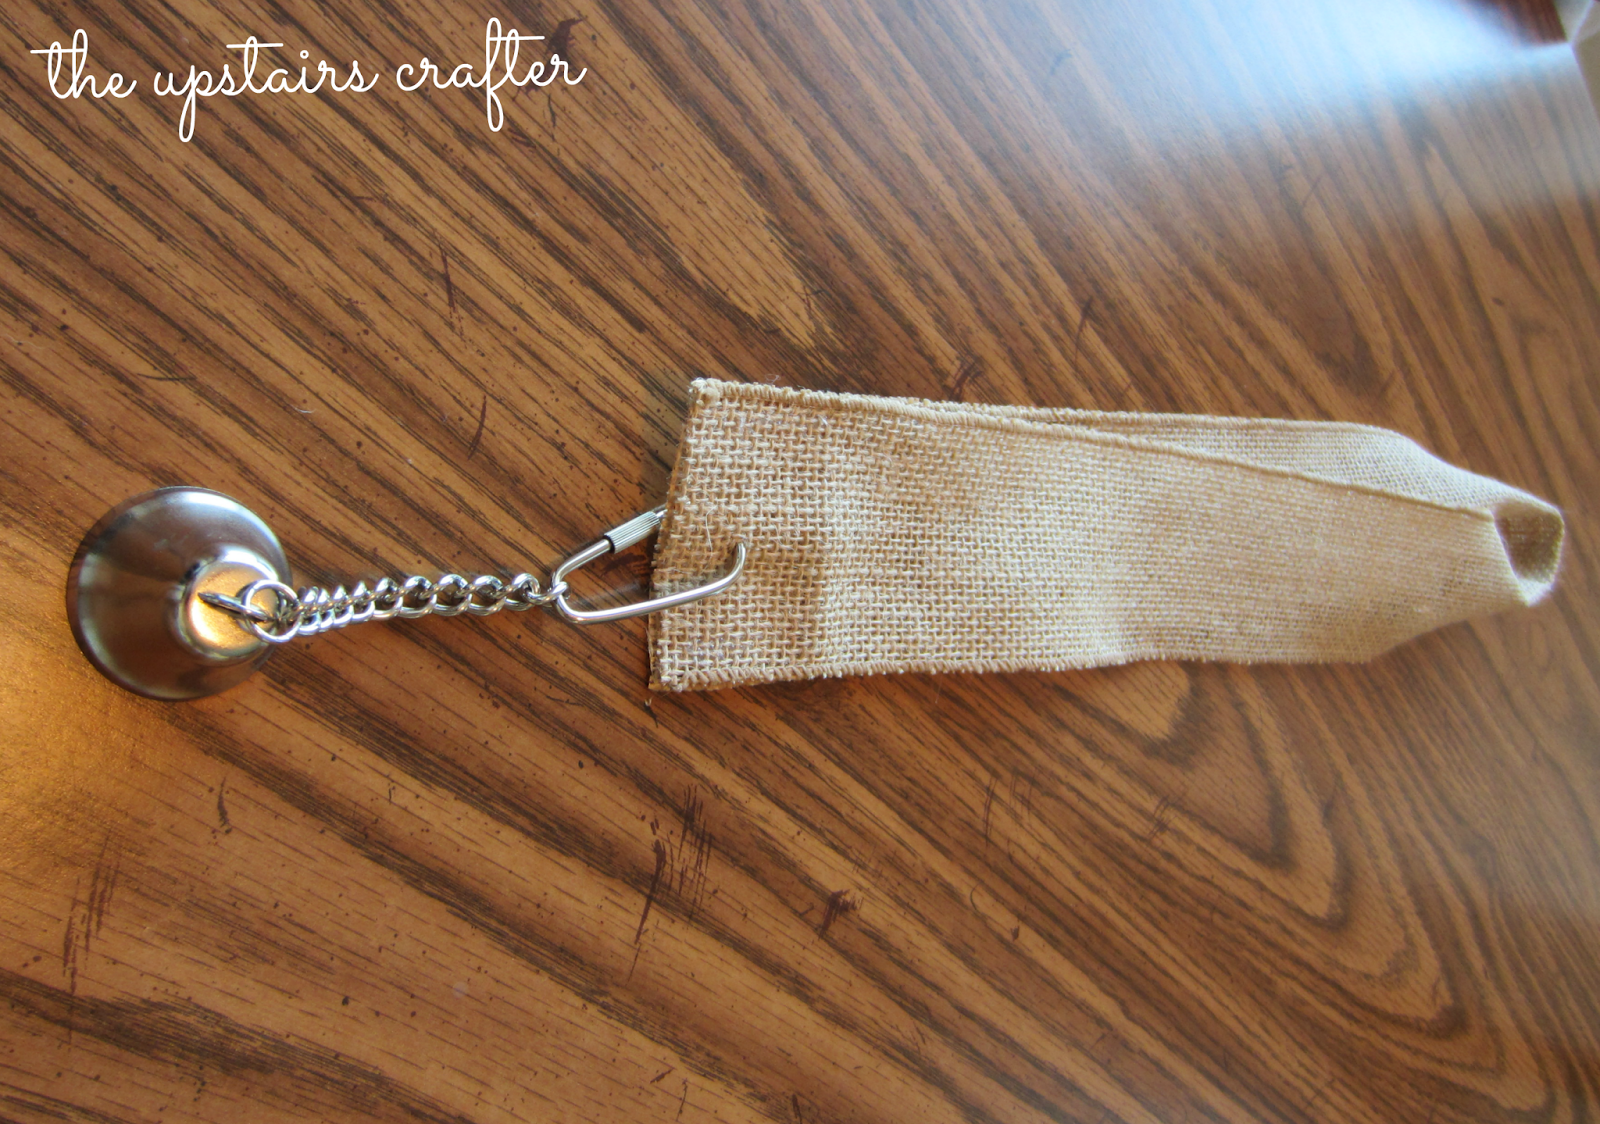
3. Bring the ends of your ribbon together so you can attach your bell. I used a bell from a bird toy I found at the pet store. It was way cheaper than an actual "dog training bell", $6 as opposed to $30. Yay for being cheap! Hot glue the ends together and hook on the bell. 


4. Next you will want to make a pretty bow. Cut an appropriate length of ribbon and tie away. I had to fiddle with the knot for a few minutes so it wasn't twisted up. Then I cut triangles to make the bow a little more fancy. 


5. Hot glue your bow over the bell hook. If you want you can sew in a couple of stitches for extra support. I will say I only used hot glue and after two months of being up it is still very secure! The choice is up to you! Hang your bell over the door and you're done! 


I am super happy with the way my bell turned out! For me, burlap was the perfect choice as it is durable and will go with any decor for any occasion. The best part about this project was after only two short weeks Tifa was ringing the bell to let us know she had to go outside!


This picture was taken a couple weeks before Christmas, so she is a little bigger now and bulked up a little bit. Send me pictures of your finished dog bells with your furbabies, I would love to see them! You can find my email address under the "say hi" section of the blog. Or tag me on Instagram or Twitter using @upstairscrafter :)

Monday, January 13, 2014

Good Ideas - 10 DIY Winter Projects


Things around here have been pretty average which is awesome. I feel like we have been going and going since we moved back to Oregon and things are finally starting to slow down. I was in need of a few mundane days to be honest. 

If you read the blog regularly or "Like" me on Facebook you will know that I have been working hard to get organized as one of my 2014 resolutions. I am happy to report it is going really well! I am keeping up with my planner (which is making my life so much easier by the way) and this past week I had all our meals planned out and actually followed through on my schedule! More on that later! The kitchen has stayed super clean, with little to no dirty dishes hanging out around the house. I must admit this is a success because Tom is really helpful in the dishes department! I wish I could boast about conquering the laundry pile, but that would be fibbing. Maybe next week? 

This past weekend I took down all of our Christmas decorations (boo), so now our apartment is looking a little sad and dull. In hopes of making our home feel a little "festive" still I found a few great ideas on Pinterest that I wanted to share with you all! I even threw in a couple of tutorials for you to wear and show off while on the go! 


**BONUS**

I ended up leaving my snowflake decorations up because I like them and they are the perfect post-Christmas decoration.


Saturday, January 4, 2014

Hello Again

Well hey there! As you can probably tell I took a little break from the blogging world so I could enjoy Christmas and New Years with family and friends! You can follow me on Instagram to see some of the fun. In short, Christmas was awesome, we spent it with both of our families and had a great time. For New Years Eve we had a small gathering of friends come over, and I think it is safe to say we had too much fun!


Happy belated New Year to you all by the way!! Can you believe it is 2014? Is it just me, or do the years fly by faster the older you get? Some of you probably saw on Facebook that I was having a hard time picking a New Years Resolution this year, I finally came up with a few!

1. Get a planner and start using it again.

I used to bring my planner with me everywhere. It was my lifeline. Sometime in the past few years I stopped using one (smart phones perhaps) and I feel like my days are far less structured, a.k.a. less things are getting done. With multiple jobs, the blog, appointments, and life in general I decided it was time to bring back my old ways.


I am proud to announce, I purchased and filled out everything in my new planner today. I already feel so much more organized! I also filled out our family calendar for the year (you can download your own here), so Tom never has an excuse of forgetting peoples birthdays ;)

2. Organize my recipes into a recipe box.

This has really been an ongoing thing for whatever reason. I started working on it a few months ago but never finished the job. I decided I can't survive with my cluttered stack of recipes on random sheets of paper in different sizes (shocking). So I have been going through and organizing said random pieces of paper and putting them on recipe cards.

3. Make the apartment feel like home.

I realize this is a super broad resolution and can be taken many different ways. Here's my definition of the goal: I want to put up pictures around the house, decorate with knickknacks, organize the office, get a cleaning schedule set, start planning meals for the week. In a nutshell, get our apartment organized and functional, and get into a habit of keeping things clean and cooking more often!

There are three of my goals for the new year. I have a couple more, but I run the chance of boring you with those ;)