HEADER - Web

Home About Me Tutorials Recipes Grab a Button Contact Shop Image Map

Friday, December 20, 2013

It's Beginning to Look a lot Like Christmas

Christmas is less than one week away! Yikes! Can you believe it? I am not even close to having all of my Christmas shopping done.. I am a procrastinator this year. However, our apartment is looking very festive and we are all in the Christmas spirit! Here is a little peek into our winder wonderland. Enjoy! :)


The two of us decorating the tree.


Our ornaments from Disneyland last year :)


My favorite ornament of all time. 


Last year I made these Harry Potter ornaments. Love them!


And finally.. the star! 


A little photo opp.


Our animals even get into the Christmas spirit! Thomas loves his elf shirt. He is so cute! :)


Tifa wasn't sure about the hat..


Or the shirt.. 


Want to make your own snowflakes? Check out the tutorial {here}.


The bookshelves are even festive. 


Special "kids" section :)


I have always wanted to  make one of these over the dining room table, and I finally did this year! :)

Remember, this is a season to enjoy and be grateful for the people we have in our lives.. not a time to be stressed and depressed. Spend some quality time with your loved ones and snuggle up in front of your tree with some hot cocoa! I hope everyone is enjoying the Christmas season as much as I am. I'm off to have a fun night out on the town with Tom! Have a great weekend everyone! 

Tuesday, December 17, 2013

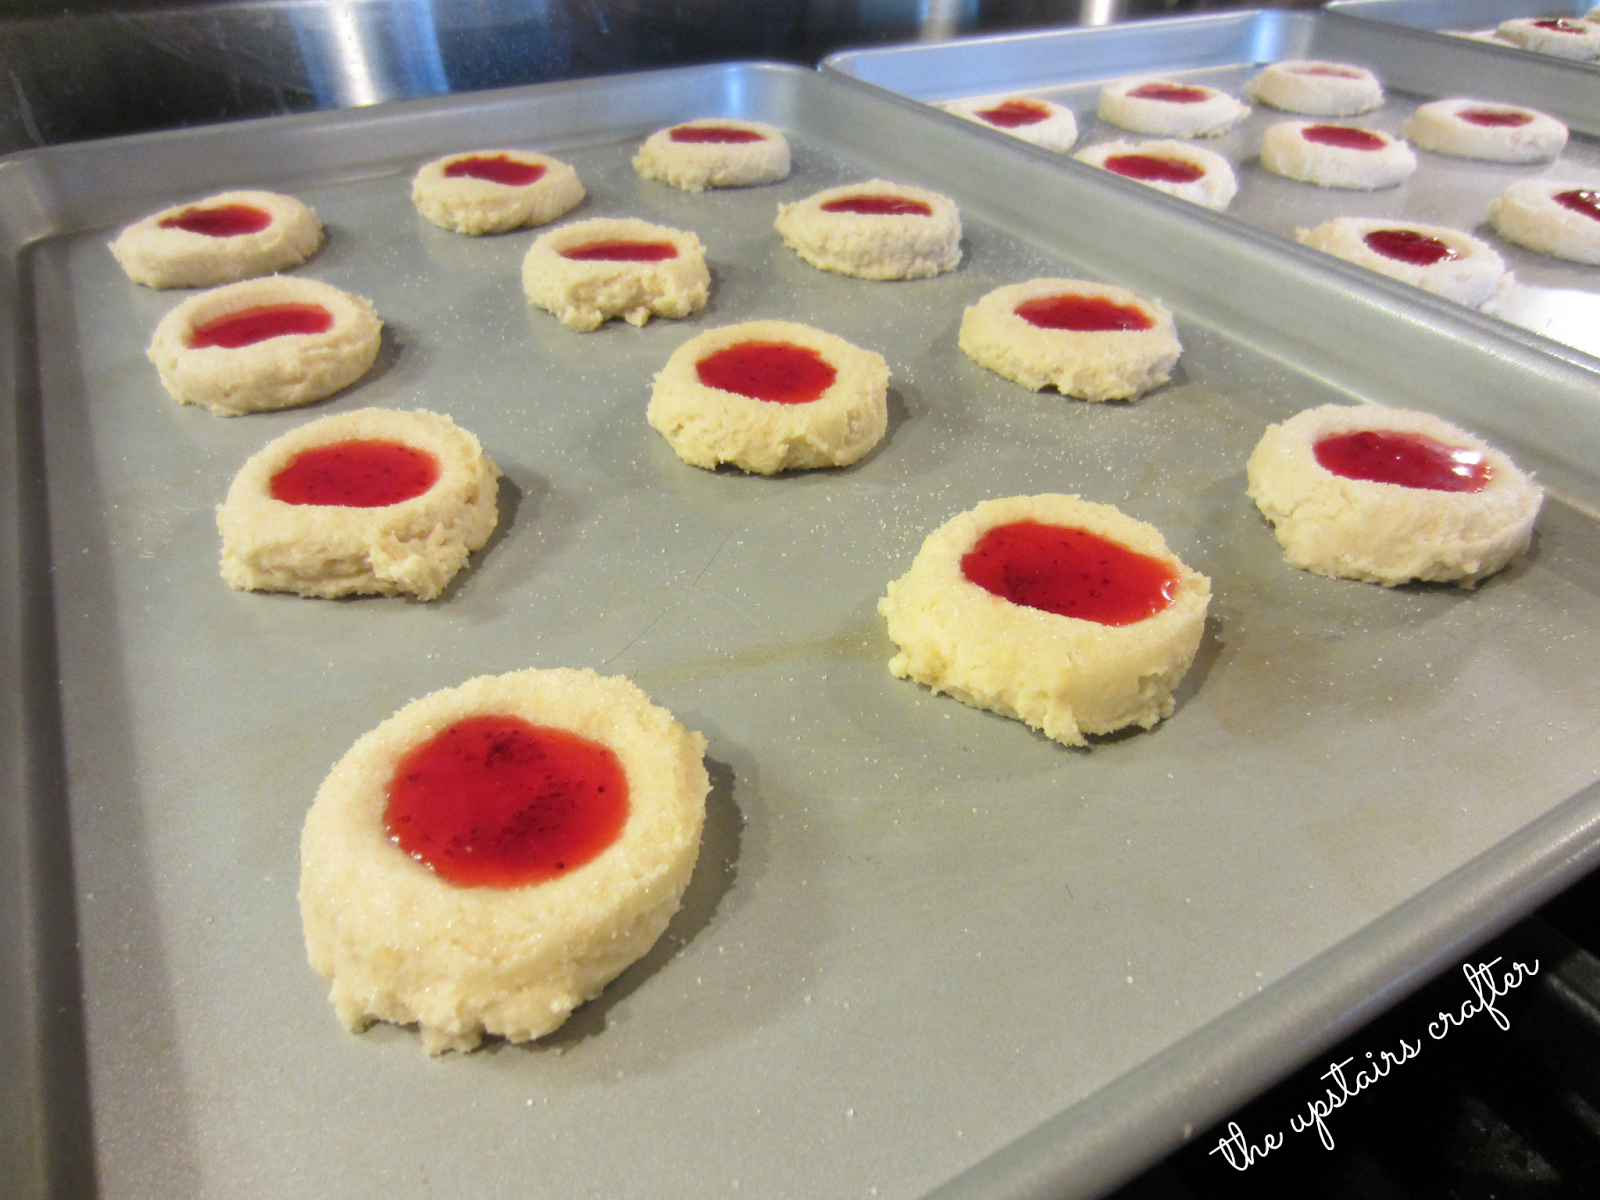
Easy Thumbprint Cookies


Did your hubby forget to mention you need to bring a dessert to that Christmas party you are supposed to go to tonight? Or do you have some unexpected holiday guests that just arrived? I'm here to save your day with my easy, no fuss Thumbprint Cookie recipe. 

The great thing about this recipe is you only need seven ingredients, and chances are you already have everything you need! Bonus for not being forced to run to the store in your PJ's for that last cup of shortening.. not that I have ever had to do that of course. ;)

I fill my cookies with jam or jelly, but they could easily be filled with caramel, Nutella, a Hershey Kiss, really just about anything! Obviously it is your preference, I just stick with jam because I love it and typically always have some on hand. Ready for the recipe that is about to make your life a little easier?

Preheat your oven to 375° and follow these simple instructions :)

Ingredients:

- 2 cups Flour
- 3/4 cups Powdered Sugar 
- 1 Egg
- 1 teaspoon Vanilla
- 1 cup Butter (soft)
- small amount of Granulated Sugar
- filling of your choice 

Directions:

1. Combine flour, powdered sugar, egg, vanilla, and butter. Mix well.

2. Roll into balls and place on non-greased cookie sheet. 

3. Sprinkle granulated sugar on top of cookie dough balls and use the bottom of a cup dipped in granulated sugar to flatten the dough balls. 


4. Use your thumb to make indents in the cookies. 


5. Fill cookies with the filling of your choice. I used raspberry and strawberry jam. 


6. Bake for 8-10 minutes (9 is perfect in my oven). 

I would say this recipe makes about three dozen cookies, but it really just depends on the size you make your cookie dough balls. From my experience, making a double batch of this recipe never hurts! They are real crowd pleasers and it is always nice to be left with extras for yourself. ;)

Friday, December 13, 2013

DIY Popsicle Stick Snowflakes


Its beginning to look a lot like Christmas around our apartment! I love putting up our decorations and making the place look like elves live with us, the animals love it too! Our hallway was looking a little bare so I decided to make some popsicle stick snowflakes to hang on two of the doors. I love how they turned out and will definitely be making more for around the house, I'm thinking some will even be red! 

The nice thing about these snowflakes is you can leave them up after Christmas ends so your house doesn't feel so bare and dull. I always get sad when I have to put my Christmas decorations away, so I am all about the "transition" decorations. Want to make some of your own? Read on!

You will Need: 


- Popsicle Sticks (I used 24 for the small snowflake and 36 for the large snowflake)
- Paint or Spray Paint of your color choice
- Hot Glue Gun and Glue Sticks
- Ribbon, Nail, and a Hammer to hang

Directions:


1. Paint or spray paint your popsicle sticks the color of your choosing.

2. After your popsicle sticks have dried, begin gluing the sticks together to form your snowflake design.

3. Once completed, cut a piece of ribbon and use it to hang your snowflakes where you want them displayed. You could even just use a nail if you are hanging them on the wall!

And that's all you need to do to create you very own popsicle stick snowflakes! Here are my finished products.


If you need more inspiration for snowflake designs check out these pins from my Pinterest Christmas board.


Be sure to grab my button and link up your own popsicle stick snowflakes below! ;)

The Upstairs Crafter


Wednesday, December 4, 2013

Good Ideas - 25 DIY Christmas Gifts


Welcome to another "episode" if you will of Good Ideas. For those of you who are just getting to know me, I love Christmas. It is my favorite time of year, hands down. I love decorating the house, excuses to bake cookies and eat them for breakfast, I love watching little kids get excited for a visit from Santa, my list could continue for days. Bottom line is I love Christmas. 

Today's Good Idea post is all about DIY Christmas gifts. I have put together 25 of my favorite DIY Christmas gift ideas to inspire you this season! Some of these could easily be modified for birthday gifts and party favors as well! For more DIY Christmas ideas stop by my Christmas board on Pinterest. Enjoy! 


Monday, December 2, 2013

Thanksgiving and New Home

Oh hey, December how are you?

Christmas is here!! Yay! So excited to get our decorations up and make some sugar cookies. Yummy. But first I would like to share a little snip bit of our life in our new home and our Thanksgiving festivities! 

I guess I should clarify that our new home is actually an apartment. I'm sure most of you know this already, but our move in date was actually supposed to be December 12th. However, a miracle happened and we were able to move in last week. Super exciting stuff. This is by far the nicest place we have ever lived (outside of our parents homes) and we could not be happier. It is a great size for the two of us and is in a good location for commuting to work and visiting family and friends. 

Unpacking is coming along quite nicely! The kitchen is done.. Hallelujah. I truly missed having my own kitchen. Our dining room and the living room are both done, they just have some boxes hanging out in them for now. Thanks to my stud muffin, our desks are put together in the office and we are planning on getting that unpacked and organized this week. Bathroom has the essentials out with the boxes tucked away and out of sight until I get some shelves for under the sink storage. As for our bedroom.. well it kind of looks like a war zone. That door definitely gets shut when guests are over right now. But with everything that has been going on I feel like we have done a lot of work around here, so I am pleased. 

Over the past couple of weeks Tom and I have both been fighting off colds. I also found out I have an eye infection in my left eye which is not only very painful but also requires eye drops that make my vision very blurry. With the fight to stay healthy, our move, and our new jobs we were both very tuckered out when Thanksgiving showed up on our front step, so we decide to stay home and celebrate Thanksgiving just the two of us. It was a bummer we didn't get to see his family, but we are planning a weekend to go out and see them before Christmas :) 

I braved the crowds on Wednesday night to grab the Thanksgiving essentials for our feast! I do not recommend going out the day before Thanksgiving for your food.. It was a total zoo at the grocery store. But I got everything we needed and drove home to start getting everything ready. 

As far as cooking goes, preparing our meal was a breeze compared to last year. I did have more utensils and tools this time which was really nice, but everything turned out perfectly and I had it ready around 4 o'clock (which according to Tom is apparently the right time to have Thanksgiving dinner). We started our meal with a salad, followed by turkey, garlic red pepper mashed potatoes, green beans with red onion, garlic, and bacon, dinner biscuits, and had pumpkin pie and cookies for dessert. Here are some pics of our yummy meal:


Sorry I didn't take any pictures of us on Thanksgiving.. But I did manage to get one of Tifa and Thomas! :)


My fur babies are so cute! I can not believe how big Tifa is getting, remember when she was smaller than Thomas? Anyway, I hope everyone had a great Thanksgiving!