HEADER - Web

Home About Me Tutorials Recipes Grab a Button Contact Shop Image Map
Showing posts with label Sewing. Show all posts

Friday, September 13, 2013

"I Did It!" Pinterest Edition


It's no secret, I love Pinterest. However, I feel like I spend way too much time simply browsing through everything. See I have this sickness, I find and pin thousands of awesome projects, and then I never complete them. Or even worse, I pin a project, buy all the supplies I need for it, then never finish the project. Can you say Pinterest fail?

When we were packing for our move I was going through my crafting and sewing supplies and realized just how many unfinished projects I had laying around. It was then and there that I promised myself I would start to actually finish said projects once we settled in our new place!

And thus my series "I Did It!" Pinterest Edition was born!

For my first project I am going to share a cute little sewing project I found a while ago. It is an ADORABLE little fox stuffed animal! Here is the original pin:


This project is a lot easier than I thought it was going to be. I always get intimidated with new projects, and this was certainly out of my sewing comfort zone! My seam ripper was close by at all times, as were my printed instructions. Make fun of me all you want, but I like things to be perfect. Especially when this little guy is a present for someone ;)

Here are some pictures from the creative process :)


I always have my helper nearby!


Snuggling the little fox.

I still need to put eyes and a nose on the little guy. I think I am going to use felt but I haven't decided! After I sewed the fox and stuffed him I decided he was too small. I also decided that I wanted the bottom to be flat so he could sit on a shelf (I don't know when I decided the fox was a he, but it is). So I am currently working on enlarging the pattern and tweaking it a bit to better suite my fox stuffed animal needs! When I have modified the pattern I will post a tutorial for you all! 


The Upstairs Crafter
<div align="center"><a href="http://theupstairscrafter.blogspot.com/" title="The Upstairs Crafter" target="_blank"><img src="http://i1299.photobucket.com/albums/ag73/speckdoodle/250x250IDidIt_zpsaa6dd261.png" alt="The Upstairs Crafter" style="border:none;" /></a></div>

If you would like to participate and share your Pinterest creations please do so! For now please grab the code and link up below! I would eventually like to make this a weekly linky party, so participation would be amaze-balls! :) If you have any suggestions about making this a linky party (perhaps hosting it every other week instead?) I would LOVE to hear read them! Just leave your ideas in the comments below. Or if you have any advise to offer about hosting your own linky party that would be appreciated as well! Thanks everyone!


Monday, April 15, 2013

Make Your Own Labels

Buying labels with your logo on them are SO EXPENSIVE!! And as much as I wanted them I could not bring myself to spend $60 plus on them.. :(

Well last week when I went to the craft store, I happened to stumble upon ... wait for it ... FABRIC PAPER. It got my crafty brain all excited and pumped! No more excuses not to have my logo on tags now! :)


Now I know you want a how to! It is super simple! Here you go.

Materials:

- One package of Computer Printer Fabric
- Printer
- Ink
- Computer

(I know you need to go pick up all these things, right? :])

1. Design your logo. I already had mine done so it was just a matter of re sizing the image. :)

2. I grabbed a template off of Avery's website {here}, downloaded it, and inserted my image. 

3. Follow the instructions on your printer fabric and print. I had to let mine set for 10 minutes, then iron on high with no steam for two minutes. Super easy!

Here they are all printed out! :)

4. Next, I ironed my sheet onto some Pellon 808. 

5. Cut out your tags. Make sure they are straight! ;)

6. Fold over the edges on the sides so your tag looks pretty, and press. Be careful of your fingers! I used an old antique iron my Grandma gave me to help get the tags pressed nicely! If you don't have an antique iron, you should! I can not imagine ironing without mine! 

7. And PRESTO! Your tags are done!


Word of warning. These tags are NOT waterproof. So if you put them on Etsy items that are washable, make sure you state to not wash the tag. :)

Sunday, April 7, 2013

Travel Trash Bag Tutorial


Happy Sunday everyone! This weekend I decided I should make something with some old jeans Tom no longer wears. So I went hunting through my Sewing Projects board on Pinterest to see what I could find! You can check out my Sewing Projects board here. After some scrolling this pin popped up:


The pin does take you to a tutorial for that exact pattern you see in the picture, but this morning I just kind of wanted to make my own!

Materials:

- 1 old pair of jeans (Tom wears 32 x 32, and the style was original boot cut)
- Coordinating Thread
- Fabric Scissors
- Rotary Cutter
- Rotary Mat
- Rotary Ruler (is that what you call them? :])
- Iron
- Quilters Pins

Directions:

1. The first thing I did was cut off the bottom seam of the leg I was using. The end was frayed from wear so I just didn't want to mess with it. :)

2. Next, I cut 15 inches off of the leg, pressed, and folded the top down half an inch. 


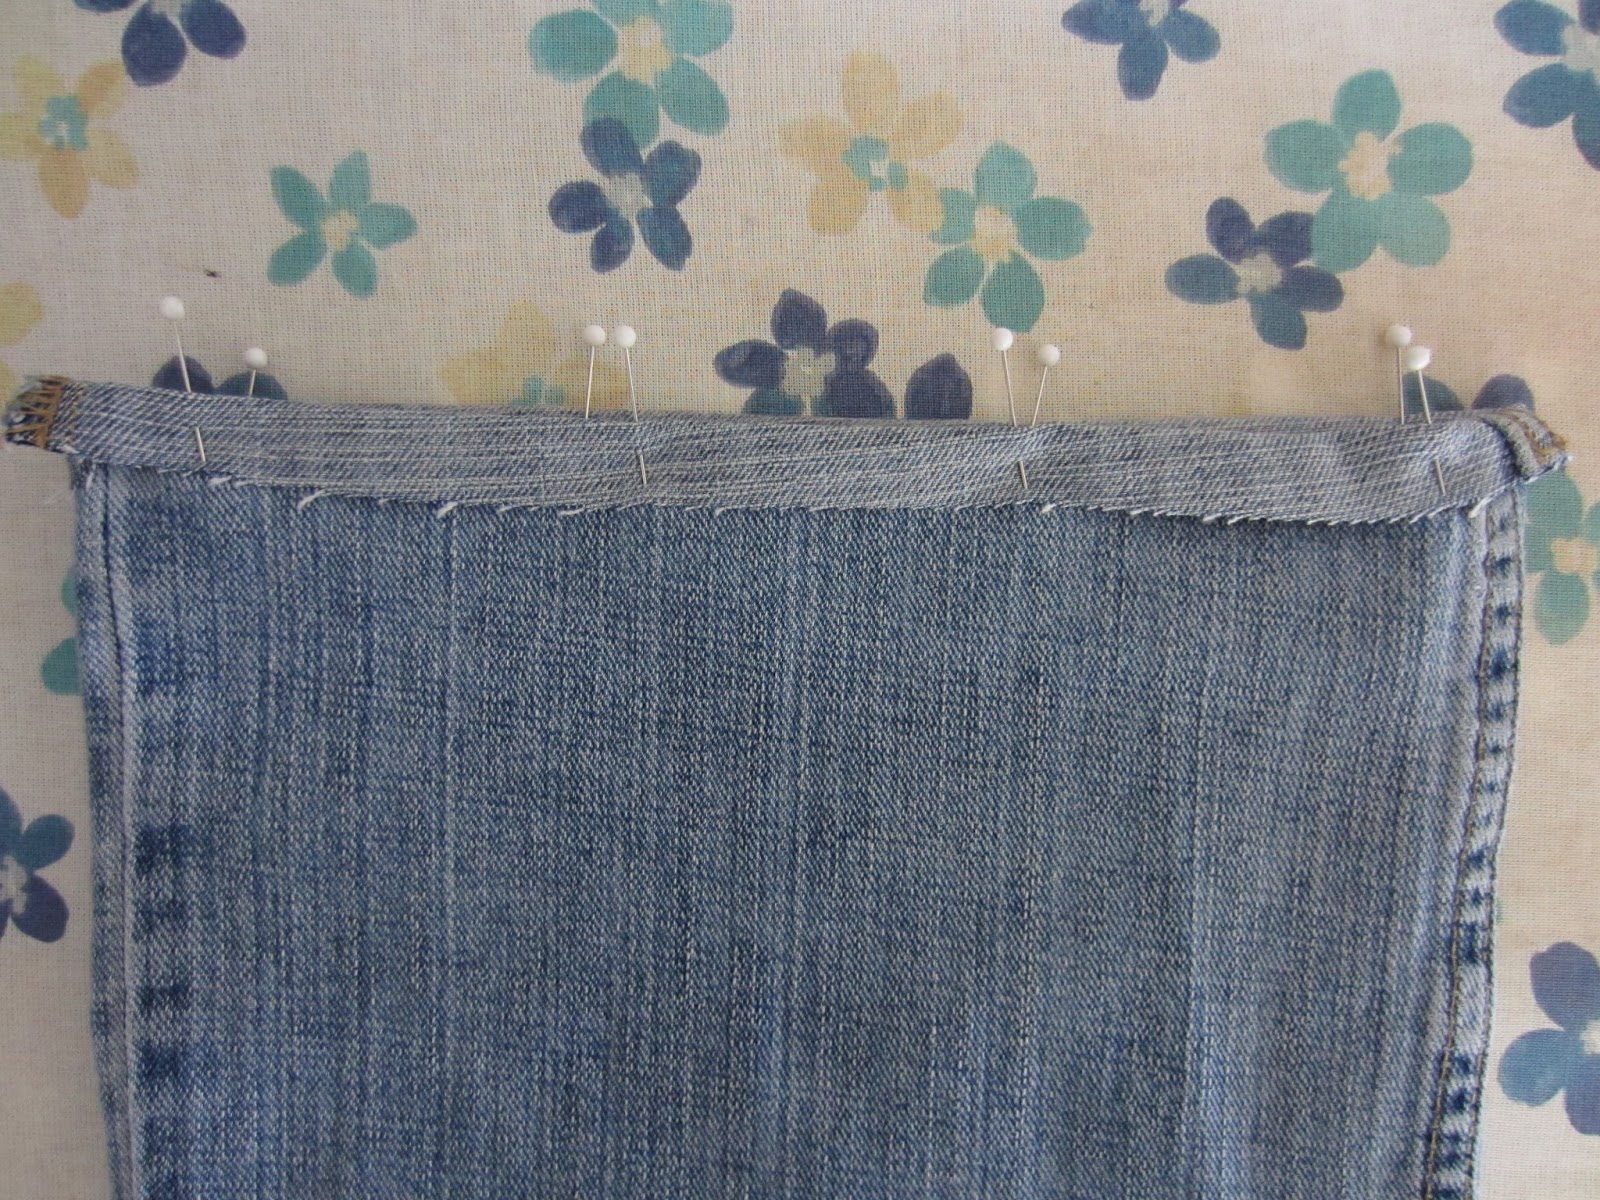
3. Pin the edges down, and sew a 1/8 inch seam all the way around. 


4. Now fold the top (the side you just sewed) down 2 inches and press. Pin to ensure the edge will be straight, and sew across the top with a 1/8 inch seam all the way around. 


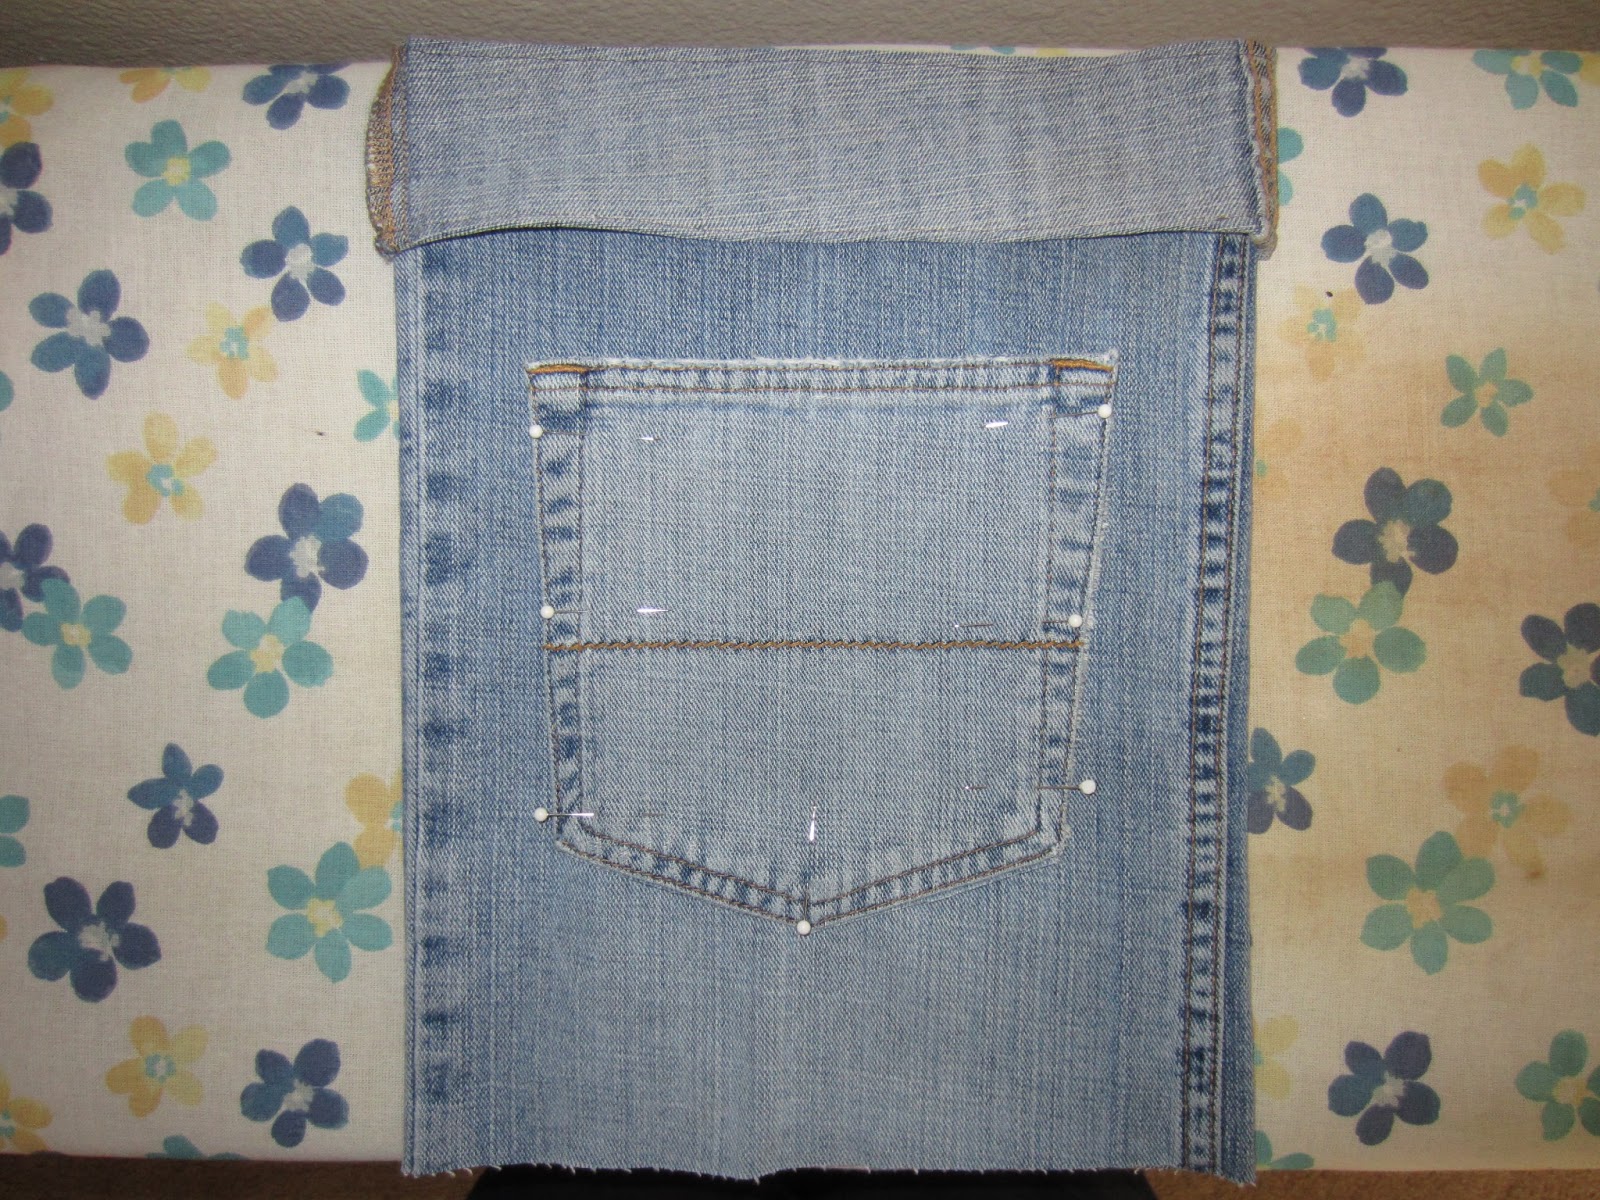
5. Now to add the pocket! I decided this would be a great place to put extra bags so there was never an excuse to throw trash on the car floor! ;) Cut out the pocket and pin to the front of your bag. Be careful to pin it only to the front side and not to the back as well! :) 


6. Sew along the seams of the pockets. Make sure to not sew your bag shut! 


7. Don't forget the top of the pocket too! I realize it could look a lot cleaner, but I don't really mind it. The front of the pocket covers it anyway.  


8. For the strap, cut a 5 inch section off from the leg of your jean. Turn the loop inside out, and cut off what would be the inner seam of the jean so it turns into a strip. Cut along the outside seam and align the strips so you have a straight line. Pin in place, sew along the seam of the jean, and cut off the access fabric on the back.


9. Fold the strap in half hot dog style, with the outside touching and press. Sew a 1/8 inch seam and flip the strap so it is right side out. 


10. Stitch 1/8 inch seams on both sides of the strap. Be careful I broke a needle on this step! :(


11. Pin the strap to the back of your bag. Sew on the straps and cut off excess fabric. 


12. Last step! Turn the bag inside out. Pin the bottom of the bag together and sew using a 1/2 inch seam. Cut off the corners, and turn right side out.


TAH DAH! Your travel trash bag is complete!! :)


I should have retaken the picture after I fixed the bag in Tom's car.. Oops! Let me know how your bag turns out! I would love to see pictures! :) 


Sunday, March 24, 2013

Items in the Shop


Have you checked out the Etsy Shop yet?? If not, you should definitely browse around! I know there isn't much on there yet, but just wait! This weekend I made another wallet for the shop, came up with a new item, and made the first prototype! I like to have my items tested out before I put them in the shop to make sure they are up to snuff.. My mom and sister are the lucky guinea pigs (and of course yours truly :])! So be sure to check back in a couple of weeks to see the BIG reveal! 


Multicolored Floral Wallet

Multicolored Floral Wallet


Pink and Yellow Floral Wallet

Pink and Yellow Floral Wallet
Pink and Blue Floral Wallet

Pink and Blue Floral Wallet

Leafy Burlap with Turquoise (Left Handed) Wallet 

Leafy Burlap with Turquoise (Left Handed) Wallet 

All wallets have an exterior zipping coin pocket as well! Be sure to view our Esty Shop for more pictures, features, and wallet details!

I am BEYOND excited to finally have my own Etsy Shop! I have been wanting to do this for a really long time. Please check back often! I have a lot of really fun product ideas in the works! Thank you for stopping by! :)